After implementing Windows Azure Pack at a customer I’ve gotten several interesting questions regarding limitations and such. One of these questions was: Can a customer have multiple public IP addresses assigned to a single virtual network, to NAT ports through the firewall?
Out of the box, via the GUI, there is no way to do this. In this version of WAP the customer can only manage 1 public IP per virtual network. This is a big issue for some customers, but hey, we’re here to solve problems 😉
Since there’s no useful GUI for the multitenant RRAS role (that I know of, at least) I started looking through the list of PowerShell modules available in Windows Server 2012 R2 and checked out the Remote Access Cmdlets, which I had used earlier to troubleshoot some site-to-site VPN’s. That’s not the right one, but make sure to check it out for future reference. Instead we need the NetNat module which contains all cmdlets to handle NAT and IP’s used by customers.
Basically you can manage 3 objects using the NetNat module:
- NetNat
NAT objects maps to the Internal Routing Domain ID (RDID) of your NVGRE networks. As you may know, each NVGRE network has it’s own RDID which makes it unique and allows Hyper-V to isolate networks from eachother. When NAT is enabled on a network it is assigned a unigue NAT object, which allows you to NAT ports from a public IP to a private IP. We can create new NetNat objects (New-NetNat), modify them (Set-NetNat) or delete them (Remove-NetNat). And of course we can view the settings by using Get-NetNat. - NetNatExternalAddress
This object is the public IP address which is assigned to your NetNat objects. Each NetNat object can contain multiple public IP’s which is referenced by their ExternalAddressID property on the object, you’ll see this later in the post. We can add IP’s with Add-NetNatExternalAddress, remove them with Remove-NetNatExternalAddress and view them with Get-NetNatExternalAddress. - NetNatStaticMapping
Here have the object that contains your NAT rules. This objects is mapped to the NetNat objects and the public IP as you’ll see when we add an IP address. - NetNatGlobal
I know, I said 3 but there is actually 4. The only property you can change here, is InterRoutingDomainHairpinningMode to choose how NAT routes traffic between 2 customer networks. Default behaviour is External, which routes traffic through the external interface. We can use Set-NetNatGlobal and Get-NetNatGlobal.
Example:[powershell]Get-NetNatGlobal[/powershell]


How do you add an extra IP then? Just follow these steps on your Hyper-V Network Gateways:
- First we’ll have to find our NetNat name. One way to do this is to lookup the already available IP the customer has:[powershell]Get-NetNatExternalAddress | where {$_.IPAddress -eq "0.0.0.0"}[/powershell]
Which gives us the following information, note the NatName:

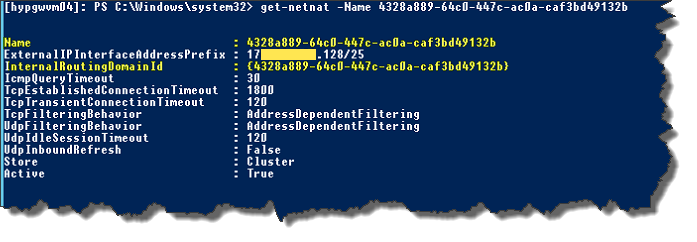
- Here I like to lookup the NetNat:[powershell]Get-NetNat -Name 4328a889-64c0-447c-ac0a-caf3bd49132b[/powershell]
And luckily it exists (Note that the name corresponds to the RoutingDomainId (RDID)):
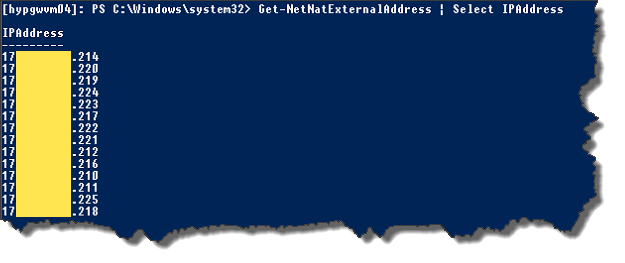
- Next we’ll find an unused IP – I tend to do this by listing the used public IP’s:[powershell]Get-NetNatExternalAddress | Select IPAddress[/powershell]
- Now we’ll add the IP, I choose the .209 IP:[powershell]Add-NetNatExternalAddress -NatName 4328A889-64C0-447C-AC0A-CAF3BD49132B -IPAddress 0.0.0.0[/powershell]
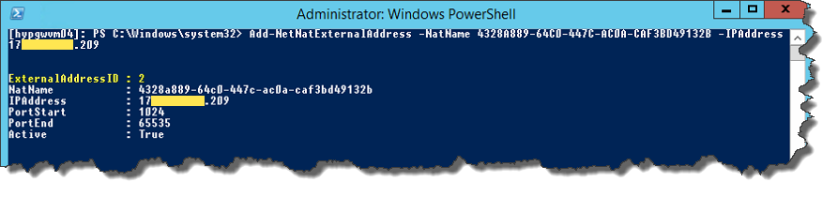
And we can check the IP is added (note the ExternalAddressID I mentioned earlier):[powershell]Get-NetNatExternalAddress -NatName 4328A889-64C0-447C-AC0A-CAF3BD49132B[/powershell]

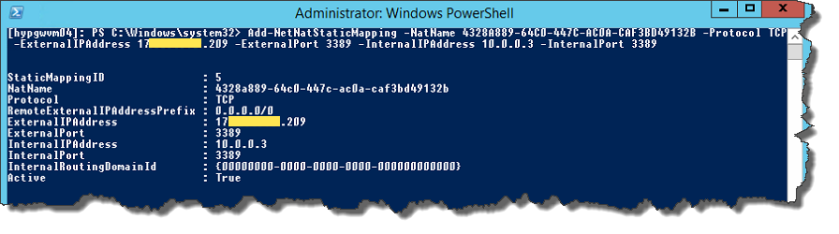
- Now we can open ports using this IP:[powershell]Add-NetNatStaticMapping -NatName 4328A889-64C0-447C-AC0A-CAF3BD49132B -Protocol TCP -ExternalIPAddress 0.0.0.0 -ExternalPort 3389 -InternalIPAddress 10.0.0.3 -InternalPort 3389[/powershell]
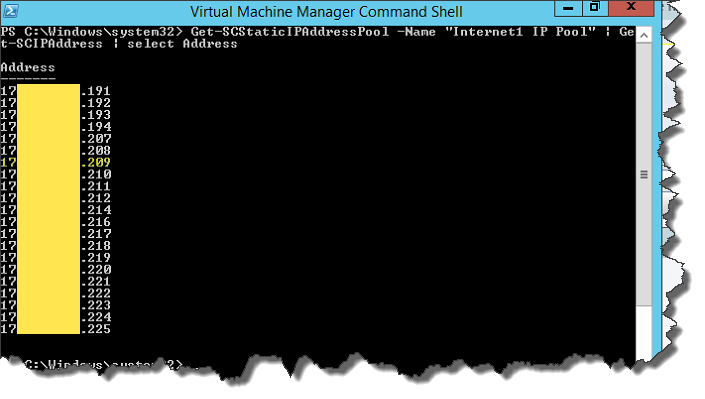
- Now that we’ve added the IP, we can actually see it’s used in VMM, by using PowerShell:[powershell]Get-SCStaticIPAddressPool -Name "YourIPPool" | Get-SCIPAddress | select Address[/powershell]


Update 16/10: I should add that while this works, it is not supported by Microsoft, so you’re on your own if you do this and run into any issues – there seems to be some issues related to this, more on those in a later post.

I cannot use ‘add-netnatexternaladdress’. Whenever I try, after entering the IPAddress Parameter, I’m getting an error: Element not found.
LikeLike
From Update Rollup 8 this feature is available through Azure Pack and VMM, so I would recommend using that approach instead.
LikeLike
Does this work with nested virtualization in azure? For example, can I have 5 nested VMs, each with their own internal NAT IP address “mapped” to 5 external IP address, so those 5 VMs can be accessed seamlessly from the outside (from the guest VM or otherwise) through those external IPs? Thanks.
LikeLike
This post is for Windows Azure Pack, not Azure – so no.
Not sure why you would run nested VMs in Azure, unless it’s just for learning? The economy and complexity of doing it, is too big to make it a good solution.
LikeLike
Thanks for responding Jesper. A few reasons for doing this:
* Cost. If I consolidate, I save. Cost of 14 4G is more than a 64G Ev3 server. With nested virtualization, I can BYOL for my nested VMs.
* Backups are simpler.
* I can use VHDx. The conversion from Gen2 to Gen1 is an ordeal, to say the least.
* Performance – I have yet to test this, which is why I asked this question.
I will probably have an answer to my own question by doing some testing, if you already know the answer, please share. Please let me know of any pitfalls as well. Much obliged.
LikeLike